DevOps
Deploy Next.js on a VPS: Git, Nginx, PM2 & Production Setup (2026 Guide)
Learn how to deploy a Next.js application to a VPS from Git clone to production. Configure Node.js, Nginx, PM2, environment variables, SSL, and automatic deployments.
Deploying a Next.js application to a VPS gives you significantly more control over your production environment than relying entirely on managed hosting platforms.
You control the server, Node.js runtime, process manager, reverse proxy, domains, SSL, environment variables, and deployment workflow.
But that control also means there are more pieces to configure.
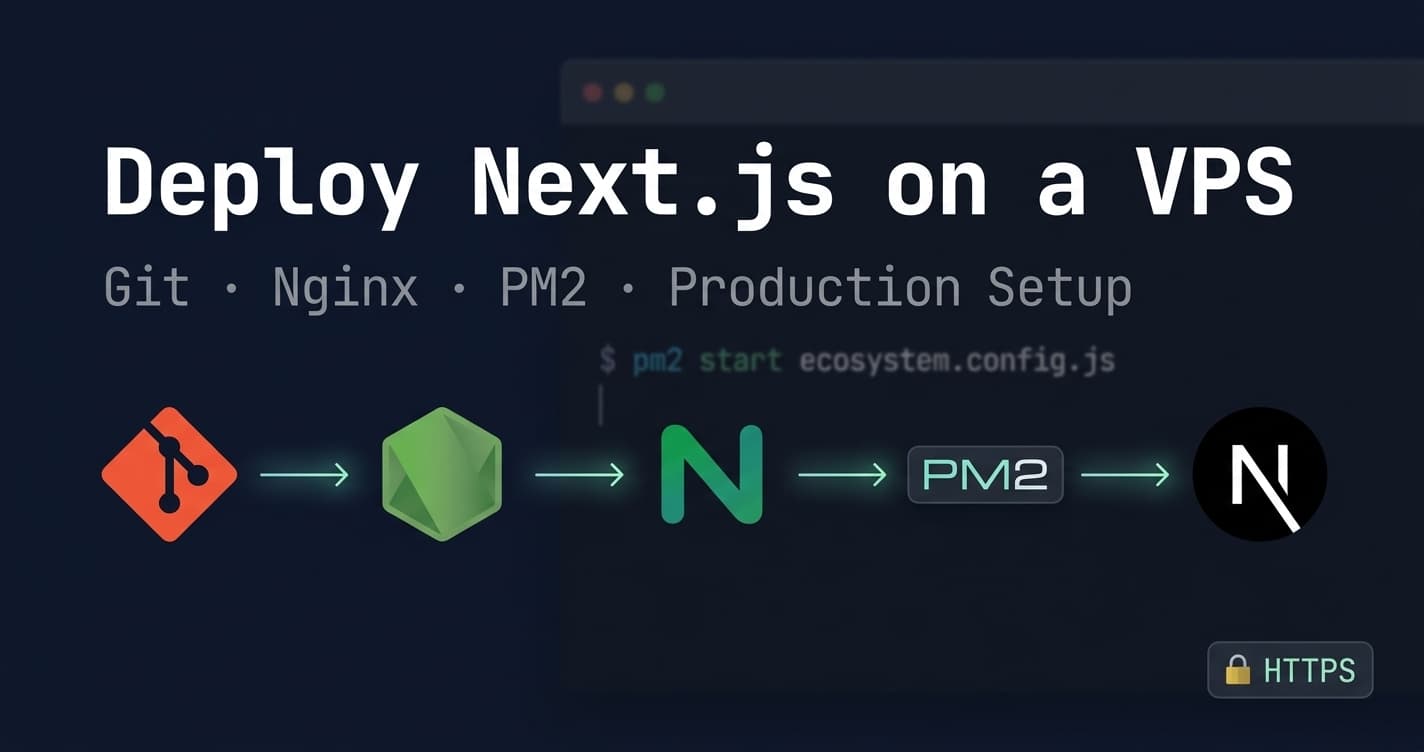
This guide walks through a practical production deployment of a Next.js application on a VPS, starting with cloning the project from Git and ending with a running application behind Nginx with PM2 managing the Node.js process.
The exact commands may vary depending on your VPS provider and operating system, but the overall workflow applies to most Ubuntu-based VPS environments.
VPS Recommendation
For this type of deployment, I recommend Hostinger VPS. It offers a straightforward VPS setup with Ubuntu, SSH access, and the server resources needed to run Next.js applications with Node.js, PM2, and Nginx.
Looking for a VPS? Get a Hostinger VPS here or use the coupon code WEBSMHAIDJFA.
Disclosure: This is a referral link. I may earn a commission if you purchase through it, at no additional cost to you.
Table of Contents#
- What We Are Building
- Prerequisites
- 1. Connect to Your VPS
- 2. Update the Server
- 3. Install Node.js
- 4. Clone the Next.js Application
- 5. Install Dependencies
- 6. Configure Environment Variables
- 7. Build the Next.js Application
- 8. Install PM2
- 9. Create a PM2 Ecosystem File
- 10. Start Next.js with PM2
- 11. Make PM2 Start After Reboots
- 12. Configure Nginx as a Reverse Proxy
- 13. Create the Nginx Virtual Host
- 14. Enable the Virtual Host
- 15. Configure DNS
- 16. Add HTTPS / SSL
- 17. Updating the Application
- 18. A Better PM2 Deployment Workflow
- 19. Common Problems You May Encounter
- 20. Production Checklist
- 21. Final Architecture
- Why Deploy Next.js to a VPS Instead of Vercel?
- Conclusion
What We Are Building#
By the end of this guide, the deployment will look roughly like this:
                         Internet
                            │
                            ▼
                    ┌───────────────┐
                    │    Domain     │
                    │ example.com   │
                    └───────┬───────┘
                            │
                            ▼
                    ┌───────────────┐
                    │     Nginx     │
                    │ Reverse Proxy │
                    └───────┬───────┘
                            │
                            ▼
                    ┌───────────────┐
                    │     PM2       │
                    │ Process Mgmt. │
                    └───────┬───────┘
                            │
                            ▼
                    ┌───────────────┐
                    │    Next.js    │
                    │   Node.js     │
                    └───────────────┘
The basic deployment flow is:
Git repository
      ↓
Clone project
      ↓
Install Node.js
      ↓
Install dependencies
      ↓
Configure environment variables
      ↓
Build Next.js application
      ↓
Configure PM2
      ↓
Configure Nginx
      ↓
Point domain to VPS
      ↓
Configure SSL
      ↓
Application is live
Prerequisites#
Before starting, you should have:
- A VPS running Ubuntu or another Linux distribution
- SSH access to the server
- A Git repository containing your Next.js application
- A domain name
- DNS access for the domain
- Node.js-compatible Next.js application
- Root or sudo access on the VPS
This guide assumes an Ubuntu-based VPS and a standard Next.js application using the production Node.js server.
Note: The exact commands may need to be adjusted depending on your VPS provider, Ubuntu version, Node.js version, and Next.js version.
1. Connect to Your VPS#
Connect to your server using SSH:
ssh user@your-server-ip
For example:
ssh root@203.0.113.10
Once connected, verify the operating system:
cat /etc/os-release
It's also useful to check the server's current resources:
free -h
df -h
A Next.js application doesn't necessarily require a powerful server, but you should make sure the VPS has enough RAM and disk space for your application and its build process.
2. Update the Server#
Before installing the application stack, update the system packages:
sudo apt update
sudo apt upgrade -y
If you're logged in as root, you can omit sudo.
I also recommend installing a few basic utilities:
sudo apt install -y git curl build-essential
build-essential can be useful when npm packages contain native dependencies that need to be compiled.
3. Install Node.js#
Next.js requires Node.js, so the first major application dependency is the Node.js runtime.
There are several ways to install Node.js on a VPS. I generally prefer using NVM (Node Version Manager) because it makes switching Node.js versions much easier.
Install NVM:
curl -o- https://raw.githubusercontent.com/nvm-sh/nvm/v0.40.3/install.sh | bash
Reload your shell:
source ~/.bashrc
Verify that NVM is available:
nvm --version
Then install the Node.js version required by your application:
nvm install --lts
Set it as the default:
nvm alias default node
Verify the installation:
node -v
npm -v
Important: Use the Node.js version supported by your particular Next.js version. Don't blindly install the newest Node.js release if your application's dependencies require another version.
4. Clone the Next.js Application#
Choose a directory where you want to keep the application.
For example:
cd /var/www
Clone your repository:
git clone https://github.com/USERNAME/REPOSITORY.git my-next-app
Then enter the project:
cd my-next-app
Check that the project was cloned correctly:
ls
You should see files such as:
package.json
next.config.js
app/
public/
Your exact structure will depend on how your Next.js project is organized.
5. Install Dependencies#
Install the project's dependencies:
npm install
If the project uses a lockfile and you want reproducible production installs, use the package-manager command appropriate for your project.
For npm:
npm ci
The important distinction is that npm install may update the lockfile, while npm ci installs exactly what is specified in the lockfile.
For a production deployment, I generally prefer:
npm ci
when a valid package-lock.json is committed to the repository.
6. Configure Environment Variables#
Next.js applications commonly require environment variables for:
- Database connections
- API URLs
- Authentication
- Third-party services
- Application secrets
- Public configuration
Create your production environment file:
nano .env.production
For example:
NEXT_PUBLIC_API_URL=https://api.example.com
DATABASE_URL=your-database-connection
NEXTAUTH_URL=https://example.com
Use the variables required by your own application.
Don't commit production secrets#
Your .env.production file should generally not be committed to Git if it contains secrets.
Make sure it is covered by .gitignore:
.env
.env.local
.env.production
The exact environment-file strategy depends on your deployment architecture, but production secrets should never be pushed into a public Git repository.
7. Build the Next.js Application#
Once dependencies and environment variables are configured, create a production build:
npm run build
A successful build should generate the .next directory.
You can then test the production application directly:
npm run start
Depending on your application, Next.js will normally listen on port 3000.
You can verify that the process is listening:
ss -lntp | grep 3000
Or test locally from the VPS:
curl http://127.0.0.1:3000
If you receive the application's HTML response, the Next.js server is running.
Stop the temporary process with:
Ctrl + C
We don't want to keep it running manually.
That's where PM2 comes in.
8. Install PM2#
PM2 is a process manager for Node.js applications.
Instead of manually running:
npm run start
you can let PM2 manage the application.
Install it globally:
npm install -g pm2
Verify:
pm2 -v
PM2 can:
- Keep the application running
- Restart it after crashes
- Start it automatically after server reboots
- Manage application logs
- Run multiple processes when appropriate
9. Create a PM2 Ecosystem File#
Rather than putting all your PM2 configuration into a command, create an ecosystem file.
For example:
nano ecosystem.config.js
A basic configuration could look like:
module.exports = {
  apps: [
    {
      name: "my-next-app",
      script: "npm",
      args: "start",
      cwd: "/var/www/my-next-app",
      instances: 1,
      autorestart: true,
      watch: false,
      max_memory_restart: "500M",
      env: {
        NODE_ENV: "production",
        PORT: 3000
      }
    }
  ]
};
The important options are:
name#
The name PM2 will use for the application.
name: "my-next-app"
script#
The command that PM2 executes:
script: "npm"
args#
Arguments passed to npm:
args: "start"
This effectively runs:
npm start
cwd#
The application directory:
cwd: "/var/www/my-next-app"
env#
Environment variables passed to the process:
env: {
  NODE_ENV: "production",
  PORT: 3000
}
Adjust this configuration to match your own project.
10. Start Next.js with PM2#
Start the application using the ecosystem file:
pm2 start ecosystem.config.js
Check the running processes:
pm2 list
You should see your Next.js application in the list.
Check its logs:
pm2 logs my-next-app
You can also inspect the process:
pm2 show my-next-app
Now test the application again:
curl http://127.0.0.1:3000
If everything works, your Next.js server is now being managed by PM2.
11. Make PM2 Start After Reboots#
A VPS can reboot because of:
- Operating system updates
- Provider maintenance
- Hardware issues
- Manual reboots
- Unexpected crashes
You don't want to manually start your application every time.
Generate the startup configuration:
pm2 startup
PM2 will print a command that you need to execute.
Run that command exactly as PM2 provides it.
Then save the currently running processes:
pm2 save
Now PM2 can restore your application after a server restart.
You can test this with:
sudo reboot
After reconnecting:
pm2 list
Your application should be running again.
12. Configure Nginx as a Reverse Proxy#
At this point the application is running on:
http://127.0.0.1:3000
But users shouldn't need to visit:
example.com:3000
Instead, we'll put Nginx in front of Next.js.
The architecture becomes:
Browser
   │
   ▼
example.com:443
   │
   ▼
Nginx
   │
   ▼
127.0.0.1:3000
   │
   ▼
Next.js
Install Nginx if it isn't already installed:
sudo apt install nginx -y
Check its status:
sudo systemctl status nginx
13. Create the Nginx Virtual Host#
Create a configuration file for your domain:
sudo nano /etc/nginx/sites-available/example.com
A basic configuration:
server {
    listen 80;
    listen [::]:80;

    server_name example.com www.example.com;

    location / {
        proxy_pass http://127.0.0.1:3000;

        proxy_http_version 1.1;

        proxy_set_header Upgrade $http_upgrade;
        proxy_set_header Connection "upgrade";

        proxy_set_header Host $host;
        proxy_set_header X-Real-IP $remote_addr;
        proxy_set_header X-Forwarded-For $proxy_add_x_forwarded_for;
        proxy_set_header X-Forwarded-Proto $scheme;
    }
}
The server_name should contain your actual domain.
The important part is:
proxy_pass http://127.0.0.1:3000;
This tells Nginx to forward incoming requests to the Next.js server.
Optional but important#
Handling next static files#
Next.js builds hashed, immutable static assets into .next/static/. These are requested directly by the browser under the /_next/static/ path, and there's no reason to route them through the Node.js process at all, Nginx can serve them straight from disk, which is faster and takes load off PM2.
Add this location block above the general location / block in the same server block:
location /_next/static/ {
    alias /var/www/my-next-app/.next/static/;
    expires 365d;
    access_log off;
}
A few things to note:
alias(notroot) is important here — it maps/_next/static/directly onto the.next/static/folder, stripping the prefix.- The path must match wherever you cloned the app in Section 4 — adjust
/var/www/my-next-appto your actualcwd. expires 365d;is safe because Next.js fingerprints these filenames on every build, so a changed file gets a new URL rather than overwriting a cached one.access_log off;just cuts noise from your Nginx logs — static asset hits aren't usually worth logging.
Your full server block now looks like:
server {
    listen 80;
    listen [::]:80;

    server_name example.com www.example.com;

    location /_next/static/ {
        alias /var/www/my-next-app/.next/static/;
        expires 365d;
        access_log off;
    }

    location / {
        proxy_pass http://127.0.0.1:3000;

        proxy_http_version 1.1;

        proxy_set_header Upgrade $http_upgrade;
        proxy_set_header Connection "upgrade";

        proxy_set_header Host $host;
        proxy_set_header X-Real-IP $remote_addr;
        proxy_set_header X-Forwarded-For $proxy_add_x_forwarded_for;
        proxy_set_header X-Forwarded-Proto $scheme;
    }
}
Note: Order matters in Nginx
locationblocks — a static prefix match like/_next/static/should sit before the catch-alllocation /so it gets evaluated first.
14. Enable the Virtual Host#
Create a symbolic link:
sudo ln -s /etc/nginx/sites-available/example.com /etc/nginx/sites-enabled/example.com
Test the Nginx configuration:
sudo nginx -t
Do not reload Nginx until this succeeds.
You should see something similar to:
syntax is ok
test is successful
Then reload:
sudo systemctl reload nginx
15. Configure DNS#
Your domain needs to point to the VPS.
Create an A record:
Type: A
Name: @
Value: YOUR_SERVER_IP
For www, you can use either another A record or a CNAME depending on your DNS setup:
Type: CNAME
Name: www
Value: example.com
DNS propagation can take some time depending on the provider and TTL.
You can verify DNS resolution from your local machine:
dig example.com
Or:
nslookup example.com
Once the domain resolves to your VPS, visiting:
http://example.com
should reach Nginx and then your Next.js application.
16. Add HTTPS / SSL#
Never leave a production application running only over plain HTTP.
For a typical Nginx setup, Let's Encrypt can provide a free TLS certificate.
Install Certbot:
sudo apt install certbot python3-certbot-nginx -y
Then request a certificate:
sudo certbot --nginx -d example.com -d www.example.com
Certbot can configure the Nginx HTTPS settings for you.
Afterward, your request flow becomes:
HTTPS
  ↓
Nginx
  ↓
HTTP localhost:3000
  ↓
Next.js
Test your application:
https://example.com
Also verify certificate renewal:
sudo certbot renew --dry-run
17. Updating the Application#
One of the biggest advantages of using Git is that updating the production application becomes straightforward.
After pushing changes to your repository:
cd /var/www/my-next-app
Pull the latest code:
git pull
Install any dependency changes:
npm ci
Create a new production build:
npm run build
Then restart the PM2 process:
pm2 restart my-next-app
The basic deployment cycle becomes:
Developer
   ↓
git push
   ↓
Production VPS
   ↓
git pull
   ↓
npm ci
   ↓
npm run build
   ↓
pm2 restart
For a small project, this manual workflow can be perfectly reasonable.
As the project grows, you can automate it using GitHub Actions or another CI/CD system.
18. A Better PM2 Deployment Workflow#
You can also define deployment commands directly inside the PM2 ecosystem configuration.
For example:
module.exports = {
  apps: [
    {
      name: "my-next-app",
      script: "npm",
      args: "start",
      cwd: "/var/www/my-next-app",
      env: {
        NODE_ENV: "production",
        PORT: 3000
      }
    }
  ],

  deploy: {
    production: {
      user: "deploy",
      host: "YOUR_SERVER_IP",
      ref: "origin/main",
      repo: "git@github.com:USERNAME/REPOSITORY.git",
      path: "/var/www/my-next-app",
      "post-deploy":
        "npm ci && npm run build && pm2 reload ecosystem.config.js --env production"
    }
  }
};
Whether you should use this approach depends on your deployment architecture.
For many small applications, GitHub Actions + SSH + PM2 can provide a cleaner CI/CD workflow.
19. Common Problems You May Encounter#
A Next.js VPS deployment can fail in several different places.
Understanding where to look makes troubleshooting much easier.
Application isn't running#
Check PM2:
pm2 list
Then:
pm2 logs my-next-app
Also test Next.js directly:
curl http://127.0.0.1:3000
If this fails, the problem is probably with Next.js or Node.js rather than Nginx.
Nginx returns 502 Bad Gateway#
A 502 usually means Nginx cannot reach the upstream application.
Check:
curl http://127.0.0.1:3000
If that fails, check PM2:
pm2 logs
If the Next.js process is running correctly, inspect your Nginx configuration:
sudo nginx -t
And check the Nginx error log:
sudo tail -f /var/log/nginx/error.log
Application works on port 3000 but not through the domain#
This usually means the application itself is fine and the problem is somewhere around:
DNS
 ↓
Nginx
 ↓
Reverse Proxy
Check DNS first:
dig example.com
Then verify the Nginx server_name and proxy_pass configuration.
Build fails on the VPS#
Run:
npm run build
directly rather than through PM2.
This makes build errors easier to read.
Also check:
node -v
npm -v
A different Node.js version between development and production can cause unexpected build failures.
Environment variables aren't available#
Remember that changing environment variables may require a new build depending on how the variable is used.
For example, variables prefixed with:
NEXT_PUBLIC_
are intended to be exposed to client-side code and can be embedded during the build.
Never put private secrets in NEXT_PUBLIC_* variables.
20. Production Checklist#
Before considering the deployment complete, verify:
- VPS is updated
- Node.js version matches application requirements
- Git repository cloned
- Dependencies installed
- Production environment variables configured
-
npm run buildsucceeds - Next.js runs correctly on localhost
- PM2 manages the application
- PM2 startup configured
- PM2 processes saved
- Nginx installed
- Virtual host configured
- Nginx configuration tested
- Domain points to VPS
- HTTPS configured
- SSL renewal tested
- Application works through the domain
- PM2 logs checked
- Nginx error logs checked
- Server firewall configured appropriately
- Production secrets are not committed to Git
21. Final Architecture#
After everything is configured, your production environment should look approximately like this:
                         ┌──────────────────┐
                         │      GitHub      │
                         └────────┬─────────┘
                                  │
                              git pull
                                  │
                                  ▼
┌───────────────────────────────────────────────────────────┐
│                         VPS                               │
│                                                           │
│  ┌─────────────┐      ┌─────────────┐                     │
│  │    Nginx    │────▶│     PM2     │                     │
│  │             │      │             │                     │
│  │ :80 / :443  │      │ Next.js     │                     │
│  └─────────────┘      │ :3000       │                     │
│                       └──────┬──────┘                     │
│                              │                            │
│                              ▼                            │
│                       Next.js Application                 │
│                                                           │
└───────────────────────────────────────────────────────────┘
                                  ▲
                                  │
                              HTTPS
                                  │
                         ┌────────┴────────┐
                         │     Browser     │
                         └─────────────────┘
The important separation is:
Nginx handles incoming HTTP/HTTPS traffic.
PM2 keeps the Node.js process alive.
Next.js serves the application.
Git provides the deployment source.
Each component has a specific responsibility, which makes the system much easier to reason about and troubleshoot.
Why Deploy Next.js to a VPS Instead of Vercel?#
After walking through this setup, it's fair to ask whether it was worth it. Vercel exists precisely to remove all of the steps covered in this guide, so why go through Git, Node.js, PM2, and Nginx by hand?
The honest answer is that it depends on what you're optimizing for.
What a VPS gives you#
- Full server control -> you can install any system-level dependency, tune the OS, or run services that don't fit into a serverless model.
- Predictable infrastructure cost -> a VPS has a fixed monthly price regardless of traffic, which can be considerably cheaper than usage-based billing at scale.
- Custom services -> you're free to run anything alongside your Next.js app: cron jobs, queue workers, WebSocket servers, or other language runtimes.
- Background processes -> long-running jobs, schedulers, and daemons are straightforward with PM2, without working around serverless execution limits.
- Easier co-location with APIs/databases -> running your app on the same network (or even the same machine) as your database or internal APIs cuts latency and avoids extra egress costs.
- Custom networking -> you control firewall rules, VPNs, internal DNS, and how services talk to each other.
What Vercel gives you#
- Zero server management -> no OS updates, no process manager, no reverse proxy to configure.
- Automatic deployments -> every push can trigger a build and deploy with no manual steps.
- CDN -> static assets and edge functions are distributed globally by default.
- Easy scaling -> traffic spikes are absorbed automatically, without capacity planning.
- Excellent developer experience -> preview deployments, instant rollbacks, and tight integration with the Next.js framework itself.
The trade-off#
A VPS isn't inherently better than Vercel. It's a trade-off between control and operational responsibility.
Vercel takes on the operational burden for you, at the cost of less control and, depending on your traffic and usage patterns, potentially higher cost. A VPS gives you that control back, but you're the one responsible for keeping the server updated, monitoring it, and troubleshooting it when something breaks.
If your priority is shipping quickly with minimal ops overhead, Vercel is usually the better default. If you need background workers, tighter cost control at scale, co-located infrastructure, or just want to understand and own the full stack, a VPS deployment like the one in this guide is a reasonable choice.
Ready to deploy your Next.js app? If you need a VPS, get started with Hostinger KVM 2 using code WEBSMHAIDJFA.
Conclusion#
Deploying Next.js to a VPS involves more manual configuration than platforms such as Vercel, but you gain considerably more control over the environment and infrastructure.
The core workflow is straightforward once you understand how the pieces fit together:
Git
 ↓
Node.js
 ↓
Next.js build
 ↓
PM2
 ↓
Nginx
 ↓
Domain
 ↓
HTTPS
Deployment is only half the story, once your app is live, performance and SEO determine whether it actually gets found and ranks. I cover that in detail in Next.js Performance & SEO Optimization: 2026 Best Practices.
Once this setup is working, the next step is usually automating the deployment process so that a push to your main branch can build and deploy the application without manually SSHing into the server.
That is where a CI/CD pipeline using GitHub Actions can take this workflow to the next level.